How to setup Messages on Mac OSX 10.8 or higher
Additional Note:
If you using a different operating system, you may find the following guides useful:
At times our support staff may ask you to contact them via Messages, which allows you to share your screen for troubleshooting puposes. Messages is free messaging application that comes with Mac OSX 10.8 or higher and requires you to have an account setup through AIM / AOL account or an Apple ID.
In order to be able use Messages for communication and Screen Sharing you will need to setup a free account. When using Mac OSX 10.8 or higher the best way to obtain a Messages account is with an Apple ID or AIM / AOL account.
If you have an AOL account (“myname@aol.com”), an Apple MobileMe account (“myname@me.com”), or a dotmac account (“myname@mac.com”), or Apple ID then you can already set up Messages without obtaining a new account. In that case, skip this step and move to Setting up your Messages ID.
If you have already used Messages before on this machine then you can skip the first few steps and move onto Setting up your Buddy List.
Getting a free Messages account back to top
The following 2 options are to help you obtain an account that will allow you to use the Messages service. Choose from one of the following options:
Option 1: Creating a free Apple ID
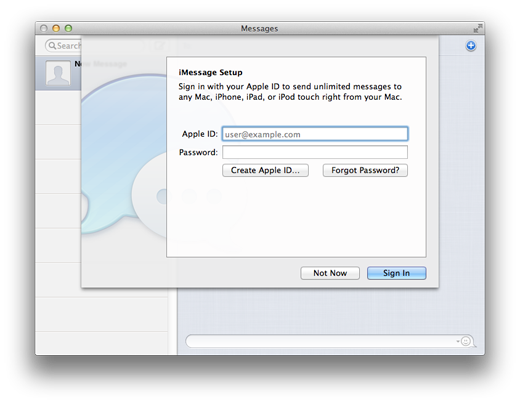
- If you want Apple to run you through the creation of a Messages account, the first time you run Messages you will be guided thorugh the process of creating and entering you account details. Click the "Create Apple ID..." button.
NOTE: If the window does not display the first time you run Messages, then you can simply obtain an account by going to www.aim.com in your web browser.
- Once you have clicked the button the next screen will prompt you to enter details to create an Apple ID. Fill in the form and click the "Create Apple ID" button in the lower right hand corner of the panel.
NOTE: When choosing a password its important to remember that Apple require your password to be at least 8 charaters, containing one uppercase letter, one number and one lowercase letter.
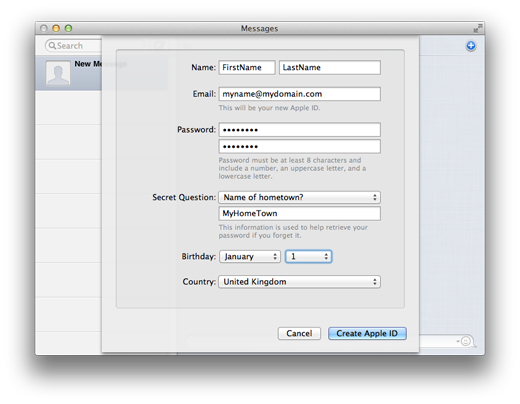
- With the form filled in with the information required, you have finalized the registration. You now have a free Apple ID which is ready to use when setting up Messages.
Option 2: Creating a free AIM / AOL account
- Go to your web browser (Safari, Firefox etc) and in the address bar type www.aim.comand click the enter key on your keyboard.

- Click the "Sign up" button
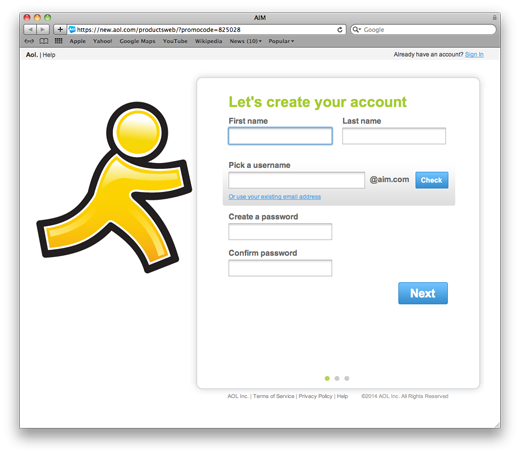
- Fill in the form with the information required to create your AIM account and follow the on-screen steps to finalize your registration. When completed you will then have a free AIM / AOL acount which is ready to use when setting up Messages.
Setting up your Messages ID back to top
Which option you use in this step will depend on which account you have created previously or already have. If you are using an Apple ID to setup Messages, then use Option 1, however if you have an AIM / AOL account or the others mentioned at the start of this guide, use Option 2.
Option 1: Using your Apple ID
- Locate and start the Messages application if it is not already open.

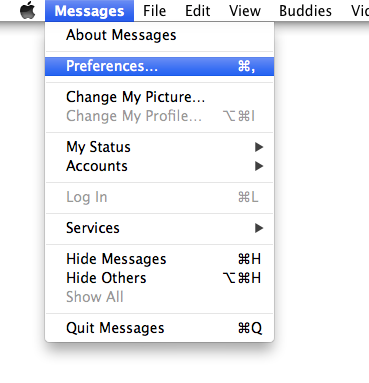
- With Messages open go to the "Messages" menu and select the "Preferences" option.
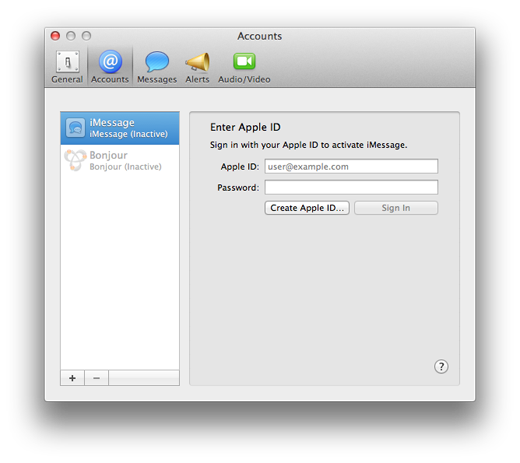
- The Messages Preferences pane will appear. In here select the Accounts tab and select the iMessage account icon in the left hand side of the panel. Enter your Apple ID and password into the sign in area.

- Click the "Sign In" button and you have now setup your new Messages account.
Option 2: Using your AIM / AOL account
- Locate and start the Messages application if it is not already open.
- With Messages open go to the "Messages" menu and select the "Preferences" option.
- The Messages Preferences pane will appear, now select the Accounts tab.
- Click the "+" button in the lower left hand corner of the window. Select AIM from the Account Type pop-up menu. Type the AIM / AOL account name you just obtained and the password. If you have a .Mac or MobileMe account name you can also enter those here, but make sure you change the Account Type pop-up option to the correct one.
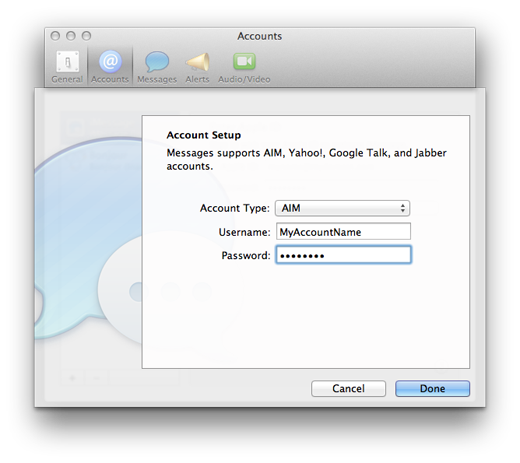
- Click the "Done" button and you have now setup your new Messages account.
Setting up your Buddy List back to top
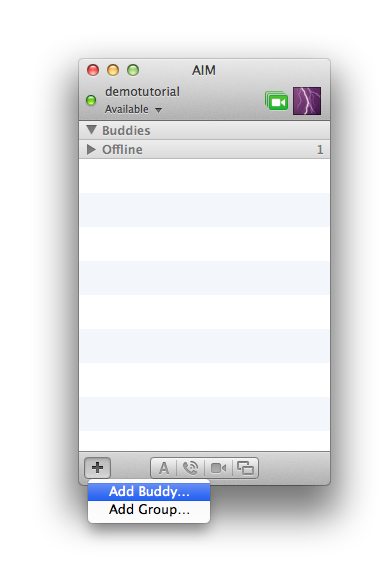
- Display your Meassges buddy list. You can find this in the "Window" menu by selecting "Buddies" or by using the Command - 1 keyboard shortcut.

- At the bottom of the AIM Buddy List window, click the "+" button and select "Add Buddy...".
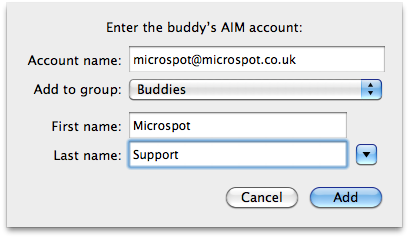
- Now enter the account information to add the Microspot Support buddy to your list, exactly as you see it below.
- Under account name enter "microspot@microspot.co.uk".
- Enter "Microspot" in the First Name field.
- Enter "Support" in the Last Name field.
- If our support representative is currently online your buddy list will look like the following.
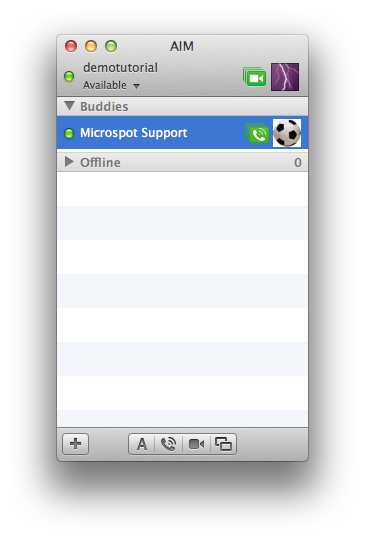
- Select the Microspot Support buddy in the list. Now you may initiate a connection by clicking on the icons at the bottom of the window. The four icons correspond to: Text Chat, Voice Chat, Video Chat, and Screen Sharing.
NOTE: You will be unable to initiate a Screen Share with anyone until you have followed the steps in the next section for Enabling Screen Sharing.
Enabling Screen Sharing back to top
- Before you are abe to share your screen with someone you will need to turn it on in the preferences. Select the "Apple" menu and click the "System Preferences..." option.
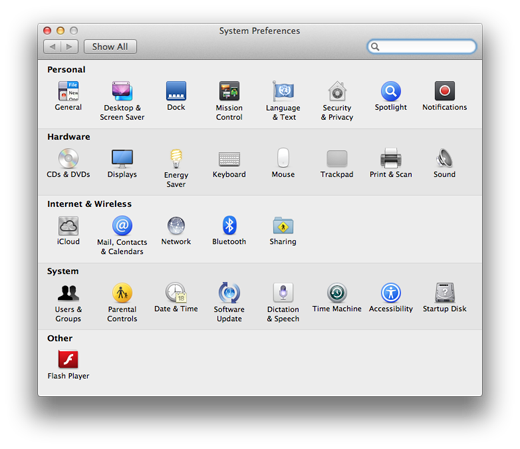
- The preferences that we are interested in are located within the "Sharing" section of the System Preferences. Click on the following icon.

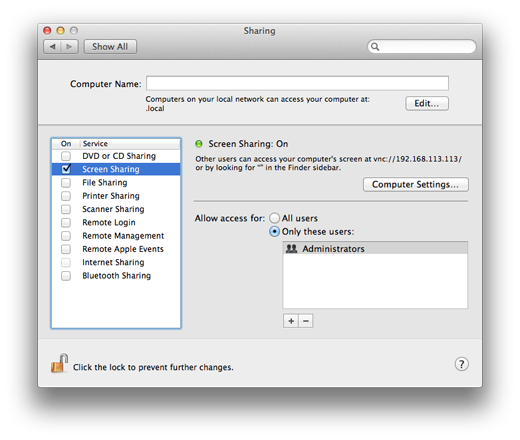
- Click the Screen Sharing checkbox so that it is turn on. An option that is turned on is dipicted by a tick within the checkbox.
NOTE: Sreen sharing will not work if the Remote Management option is turned on. Make sure that the Remote Management option is turned off before attempting to share a screen with someone.
- Close the System Preferences and relaunch Messages
You have now successfull created a new Messages ID, set up your Messages account and configured your preferences to allow for screen sharing. You are now ready to voice chat, text chat, video chat and screen share with Microspot and anyone else in your buddy list.
Additional Note:
Nobody will be able to communicate with you on Messages unless your Messages account is signed in and is online and that you accept their request to communicate.
Published by Microspot Limited - © Copyright Microspot Ltd 2014 All right reserved.
Follow Us: