← Back to Tutorials
Working with Layers in MacDraft
Layers are perfect for creating your drawings in controlled sections. You can show or hide different layers at different times and work at different scales. For example, lets say you have created a floor plan with multiple layers. You can hide particular layers so you can send off the electrical schematic to your electrician or show the floor plan and décor to send to your interior designer. Each layer will display its intended scale too meaning your document will be set up perfectly for those it is intended for.
What We Will Learn
In this tutorial we will be leaning how to use layers using the following skills:
- Overview of the Layers panel
- Adding & Removing layers
- Naming a layer
- Changing the scale of different layers
- Layer selection
- Moving/Dragging Layers
- Merging Layers
- Moving objects from one layer to another – Pro Users
Download the Elevation Layers.md70 file for this tutorial.
Step 1 - Overview of the Layers Panel
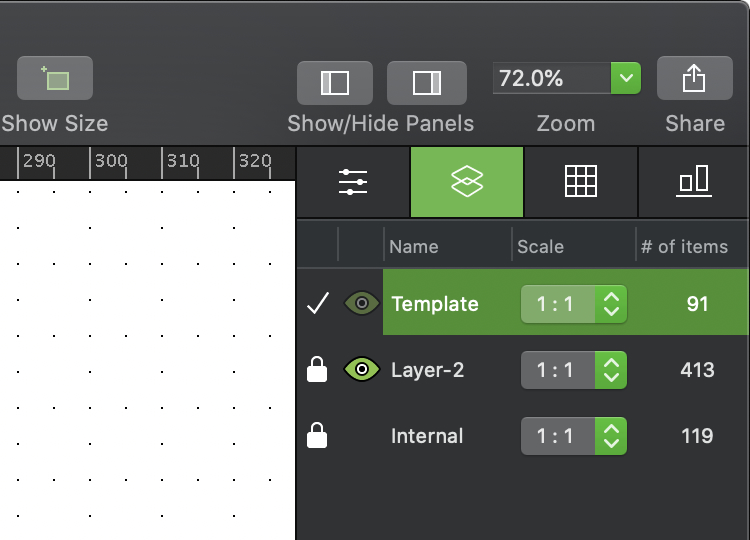
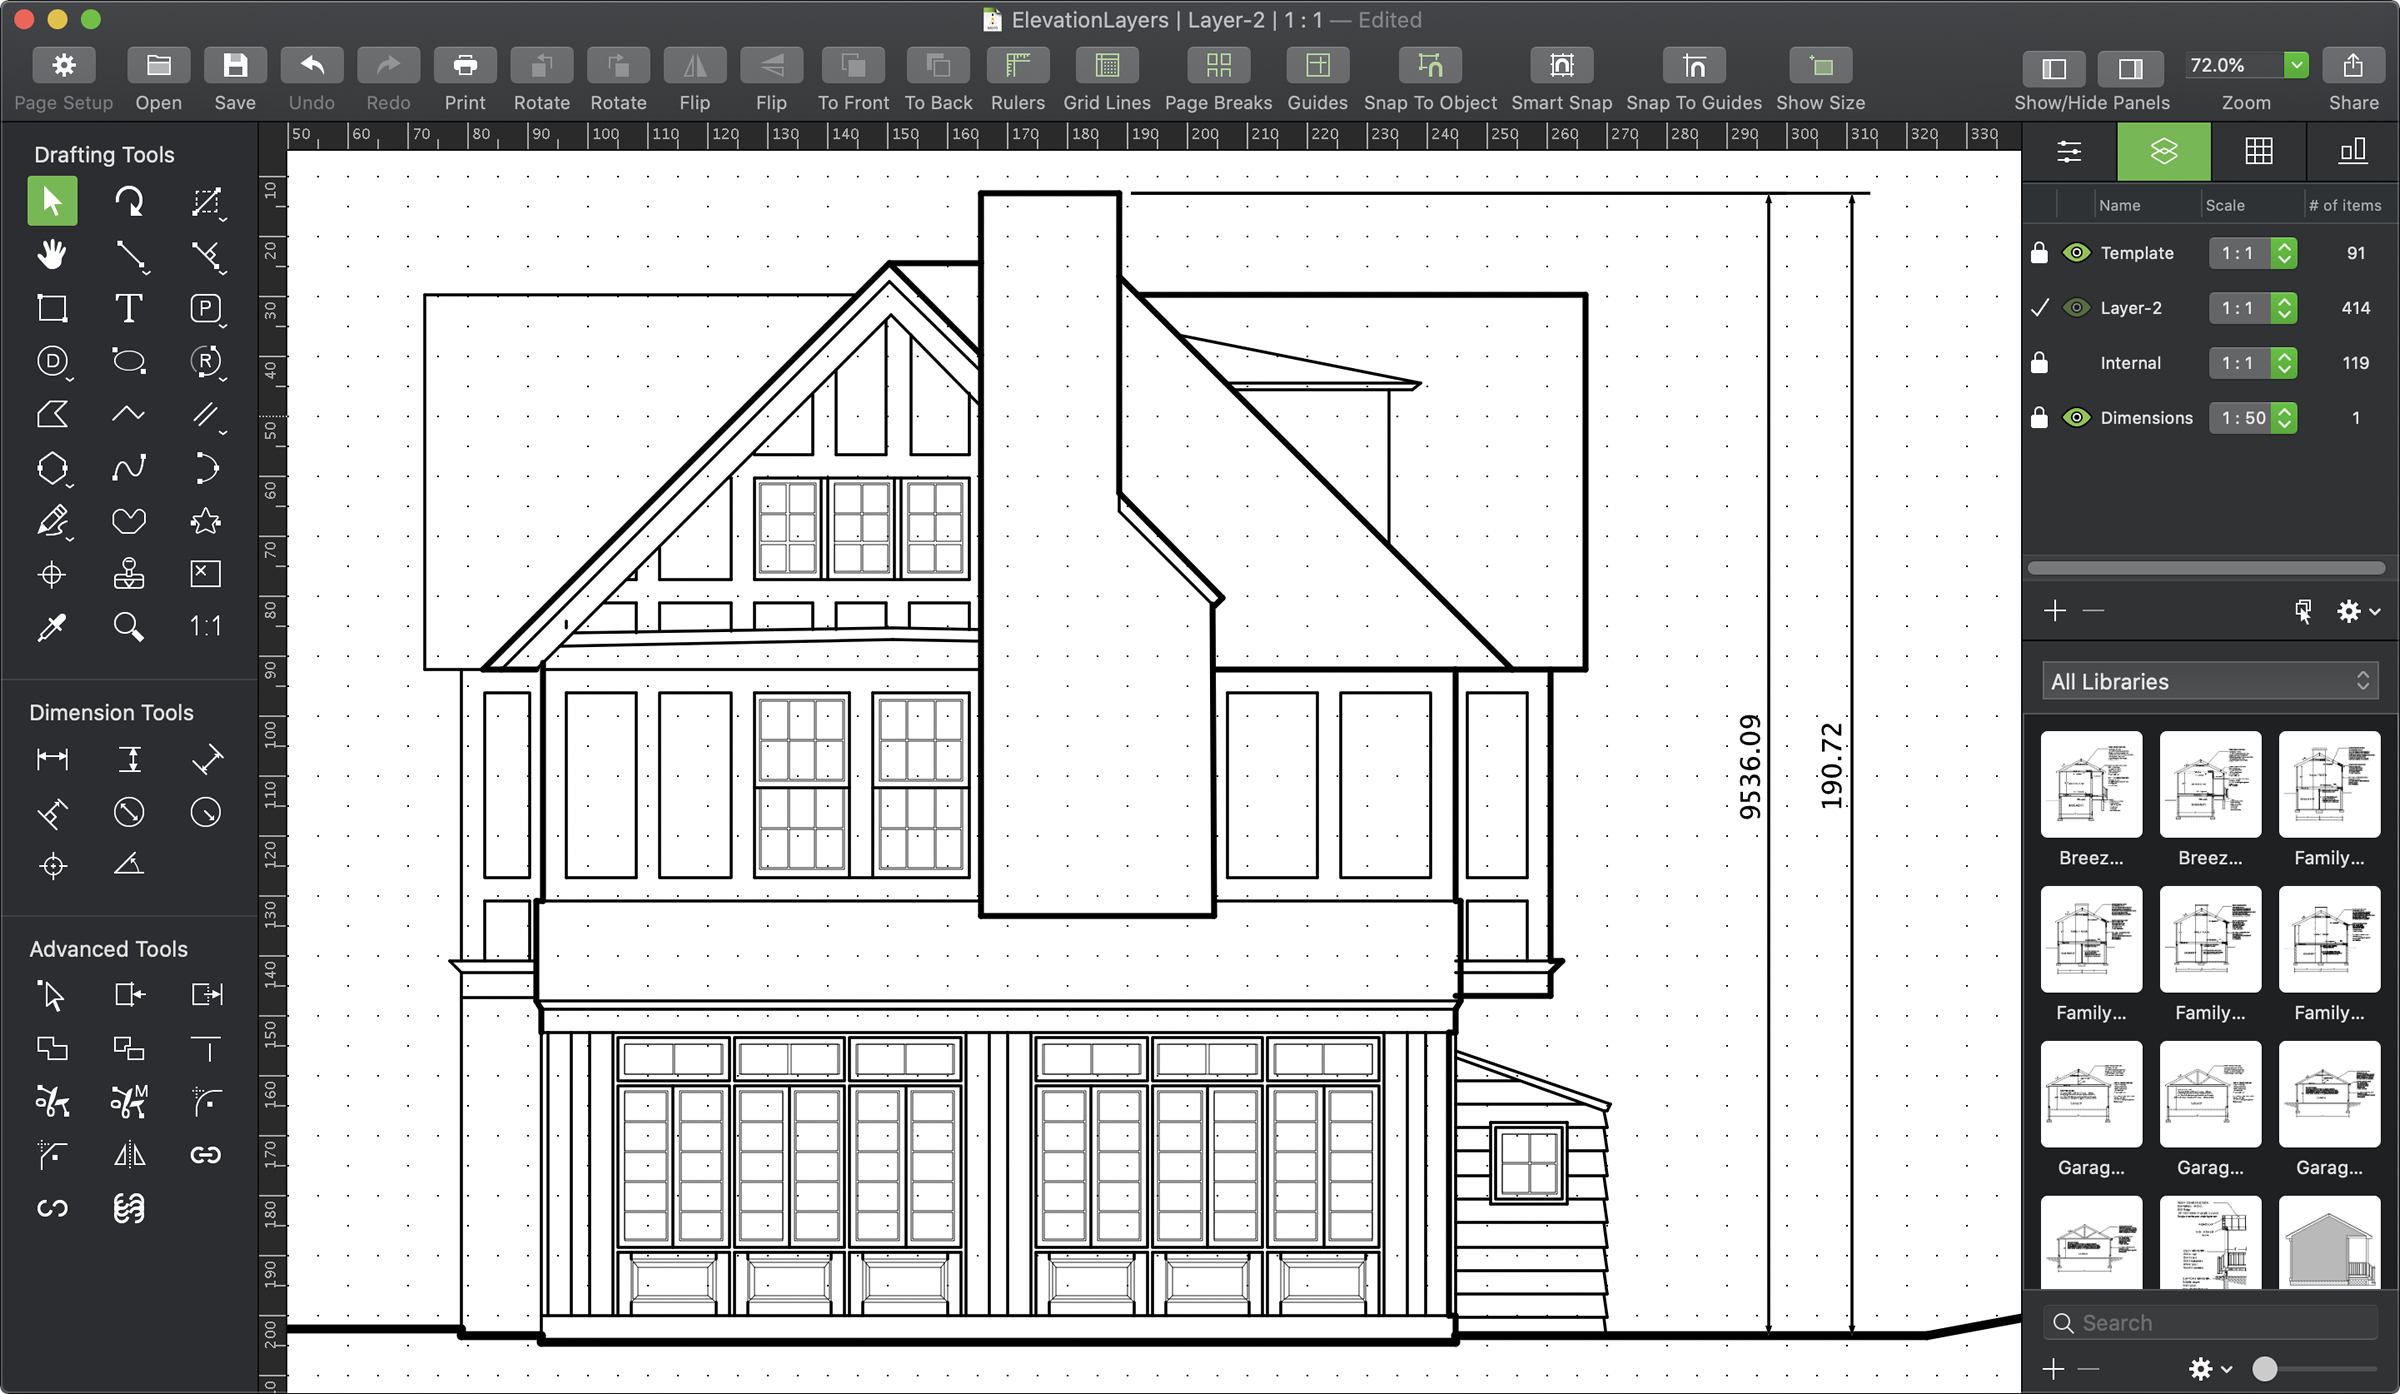
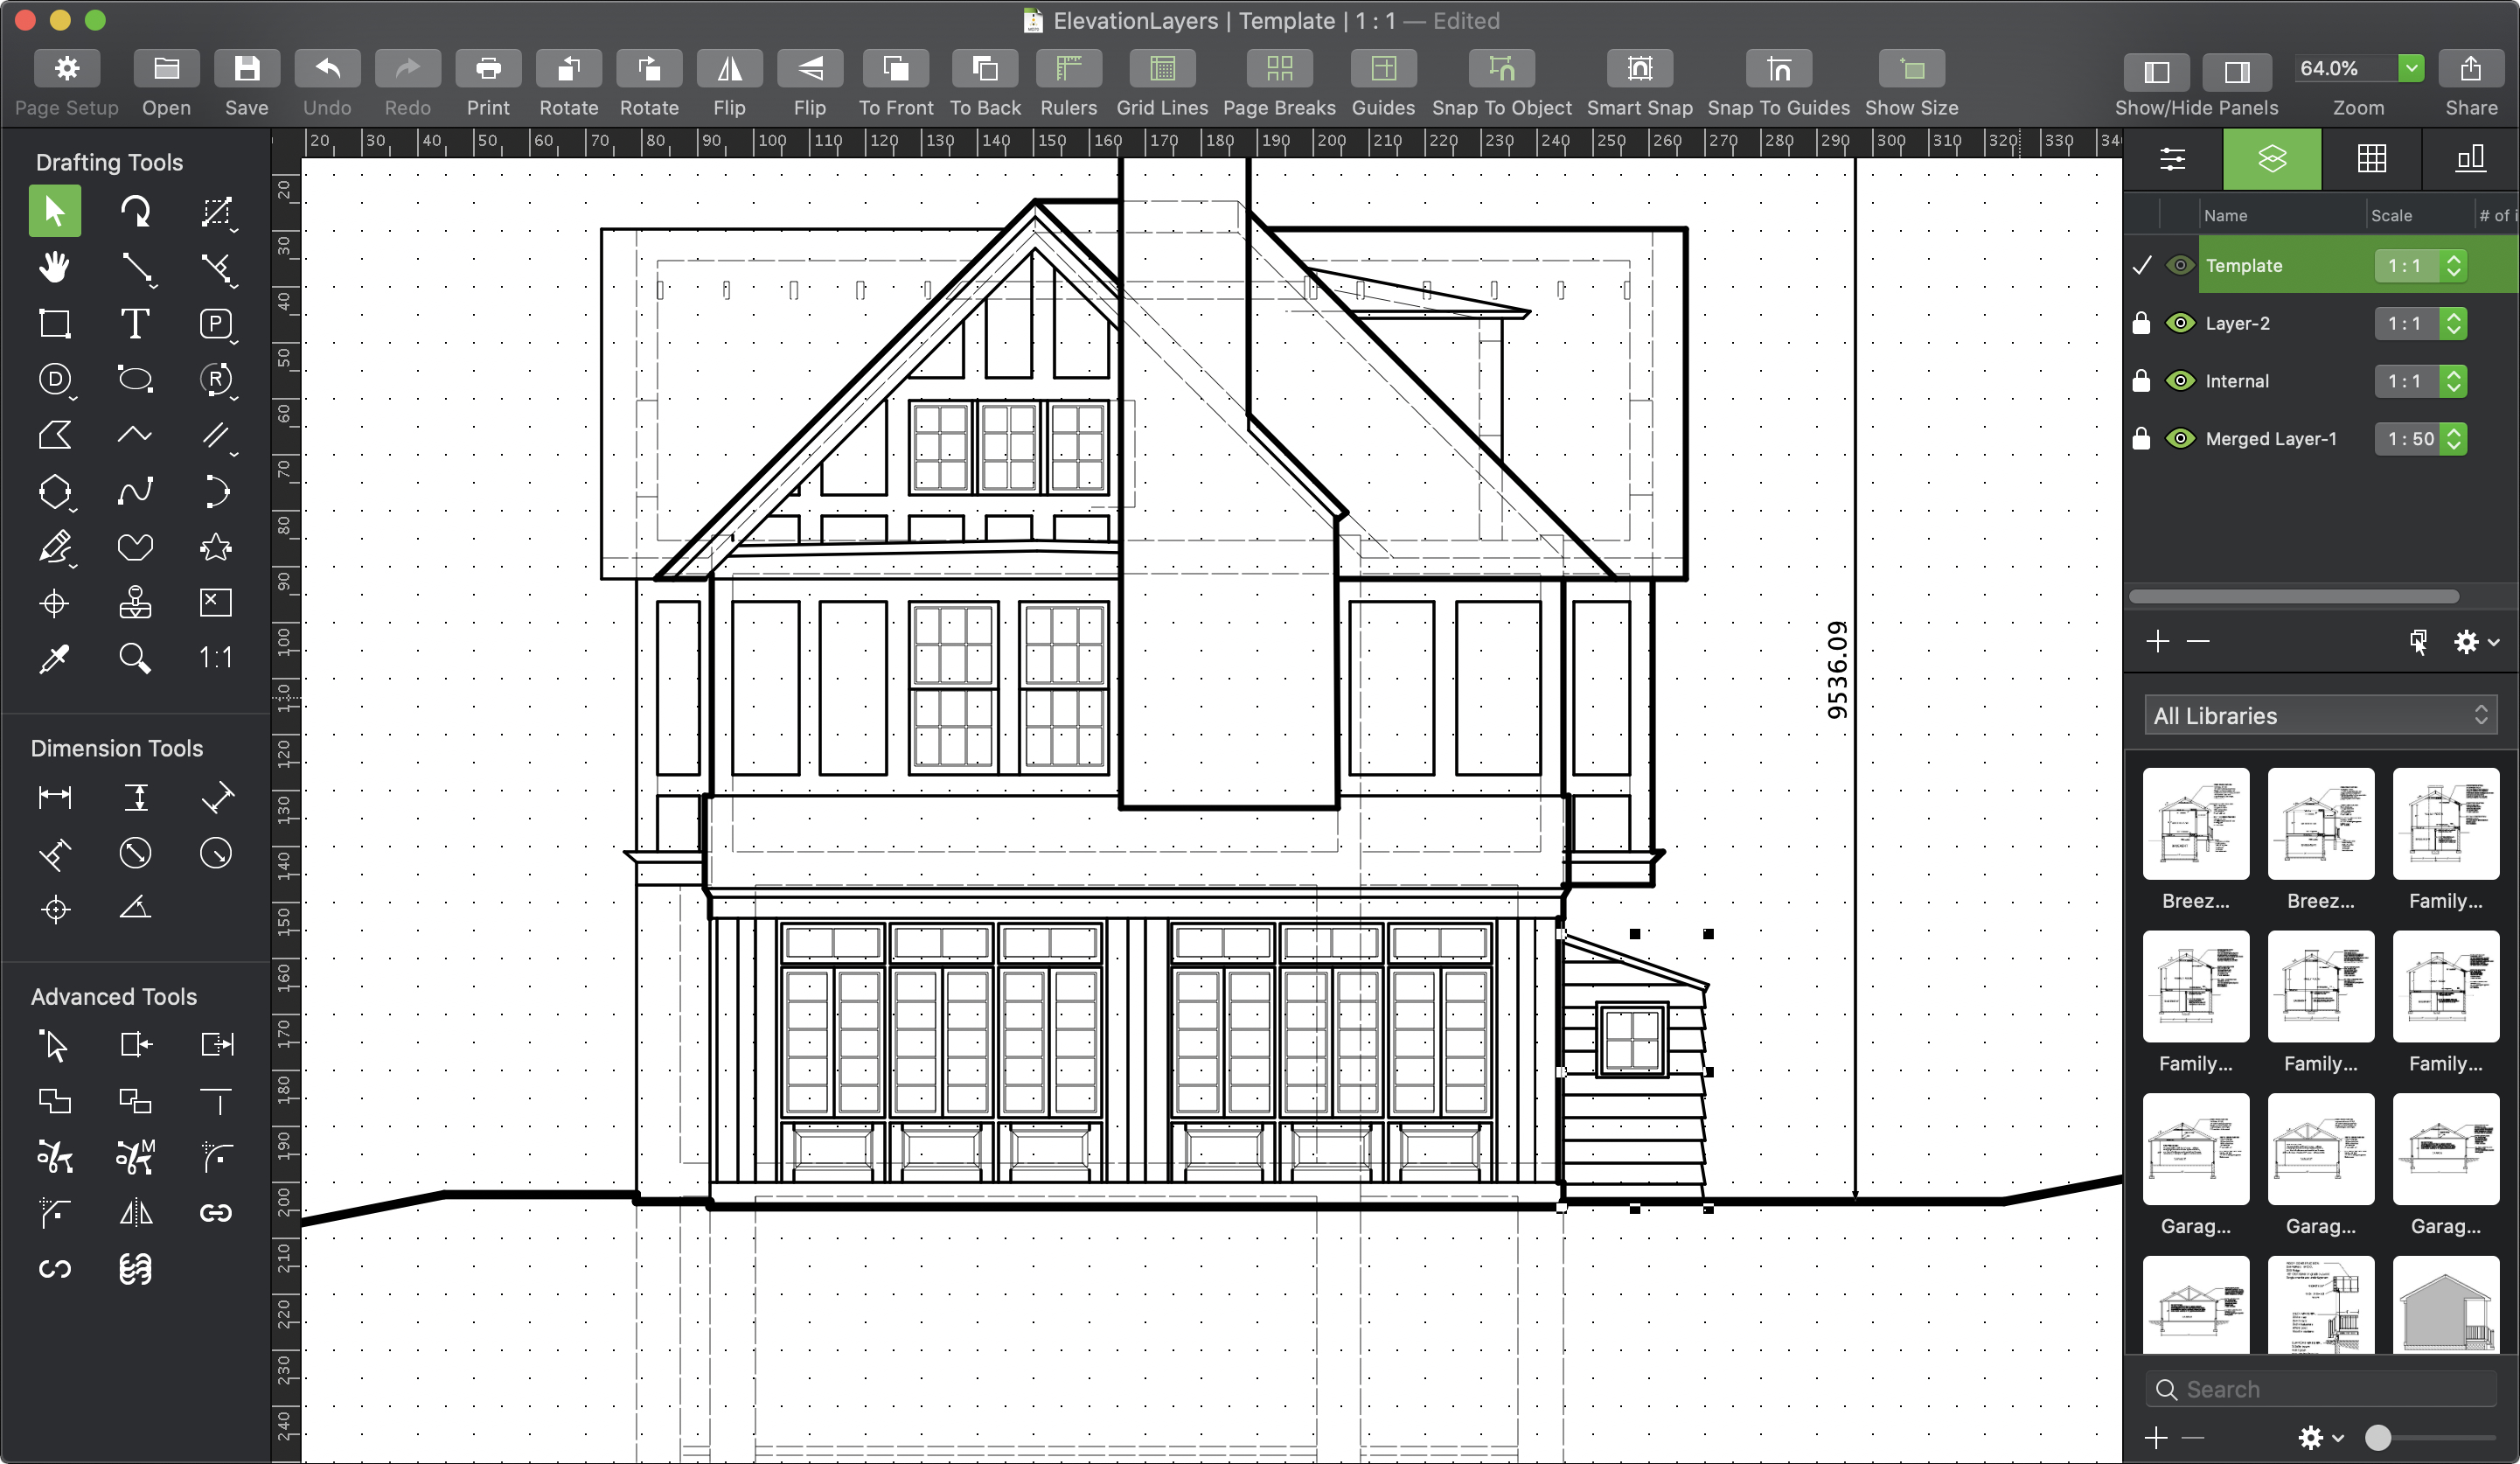
Open the Elevation Layers.md70 file provided. The Layers panel is the second tab on the right panel, select it to bring up the layers panel. When you open a new blank document for the first time, the first layer by default, will be named "Layer-1".
- The Active Layer is defined by a tick symbol, no other layer will have a tick as only 1 layer can be active at once.
- Layer Visibility will be defined by a green eye (visible), a washed out eye (grayed) or no eye (hidden).
- Layer Name, new layers will be named sequentially, Layer-2 > Layer-3 > Layer-4 etc, these can all be renamed at any point.
- Scale allows you to change the scale of that particular layer. It is a pop up with many different scaling options.
- # of items shows you how many individual objects, lines, text boxes etc in the laye
- + / - allows you to add or remove new or existing layers.
- Select Layer is a tool which, when selected, allows you to click any object in your drawing and the Layers panel will activate that objects layer making it instantly accessible.
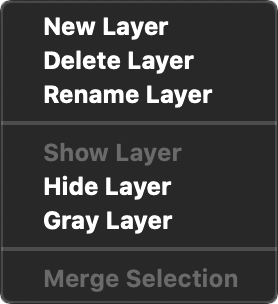
- Options. This is a pop up giving you the option to add a new layer, delete a layer, rename a layer, show/hide/gray a layer and Merge your selection of layers in to a single layer.
Step 2 - Adding and removing layers
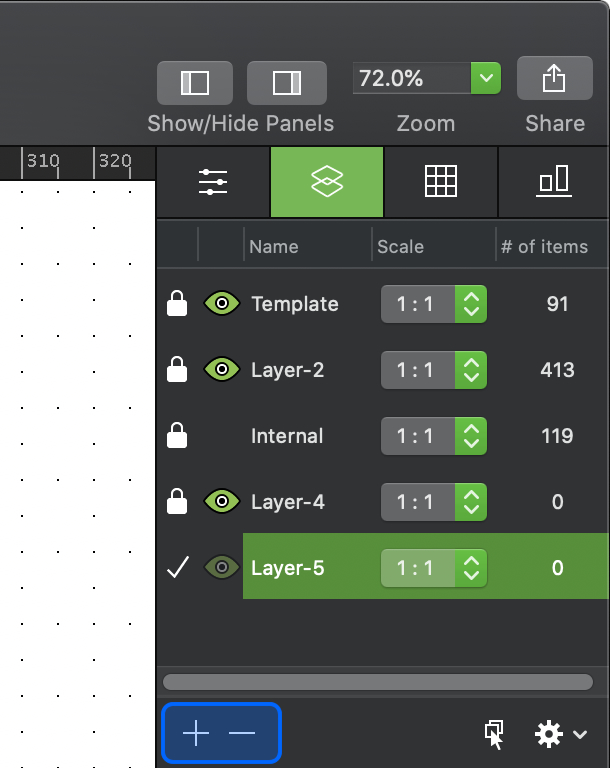
Once open, you will see this file has 3 layers. Lets add a fourth and a fifth Layer. Use the + (plus) button to add another layer, do this twice. Layers are added sequentially, in a new document the first layer will be called Layer-1 by default, the newly added layers will be called Layer-2, Layer-3 and so on.
- Click the + (plus) button twice
- The two new layers will apear at the bottom of the list.
- To remove a layer, select the layer by clicking the layer name. It will highlight green unless you have set a different color in system preferences.
- Click the – (minus) button and you will see it disappear. Please note that removing a layer will also delete all of the content drawn inside that layer.
Step 3 - Renaming a layer
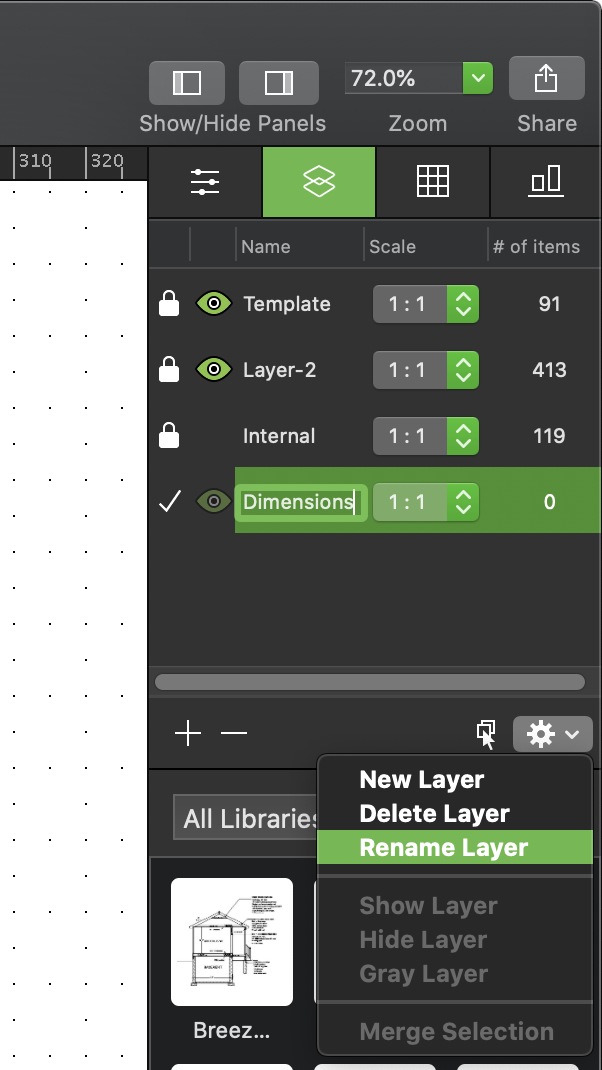
There are 2 ways to rename a Layer in MacDraft 7. Firstly you can select the layer and double click the Layer name, alternatively you can click on the Options (gear) symbol to display a popup in the bottom right and choose Rename Layer. Do this and rename Layer-4 to Dimensions. Press the Enter/Return key on the keyboard to place the text.
- Double click the layer name or select the layer and choose Rename Layer from the Options (Gear) menu.
- The cursor will highlight the layer name, type Dimensions and press the Enter/Return key on the keyboard to change the name.
Step 4 - Changing the scale of a single layer
Scale is a fundamental feature of MacDraft. It allows you to show anything from a house elevation to a micro chip with true dimensions on the same page. It also allows us to measure at a different scale, the drawing we have here was originally created at 1:50 scale but has been added to a 1:1 document. We can still measure at 1:50 by doing the following.
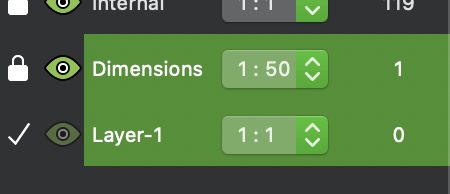
- Select the Dimensions layer by clicking the Padlock symbol on the left of the lare name. A tick will appear instead of the padlock, which represents the active layer.
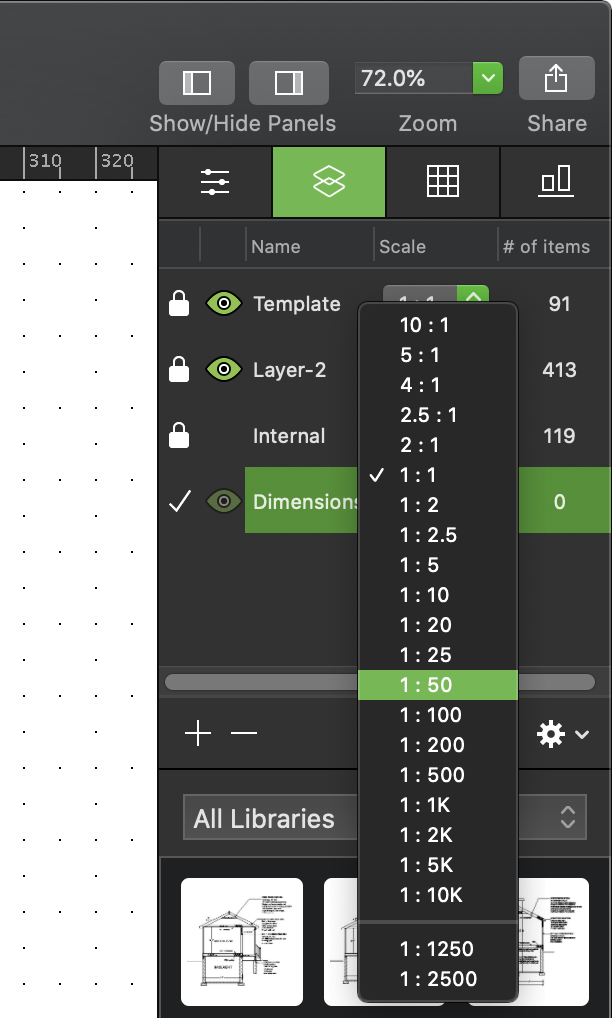
- Click on the pop up which currently shows 1:1, a dialog of options will appear
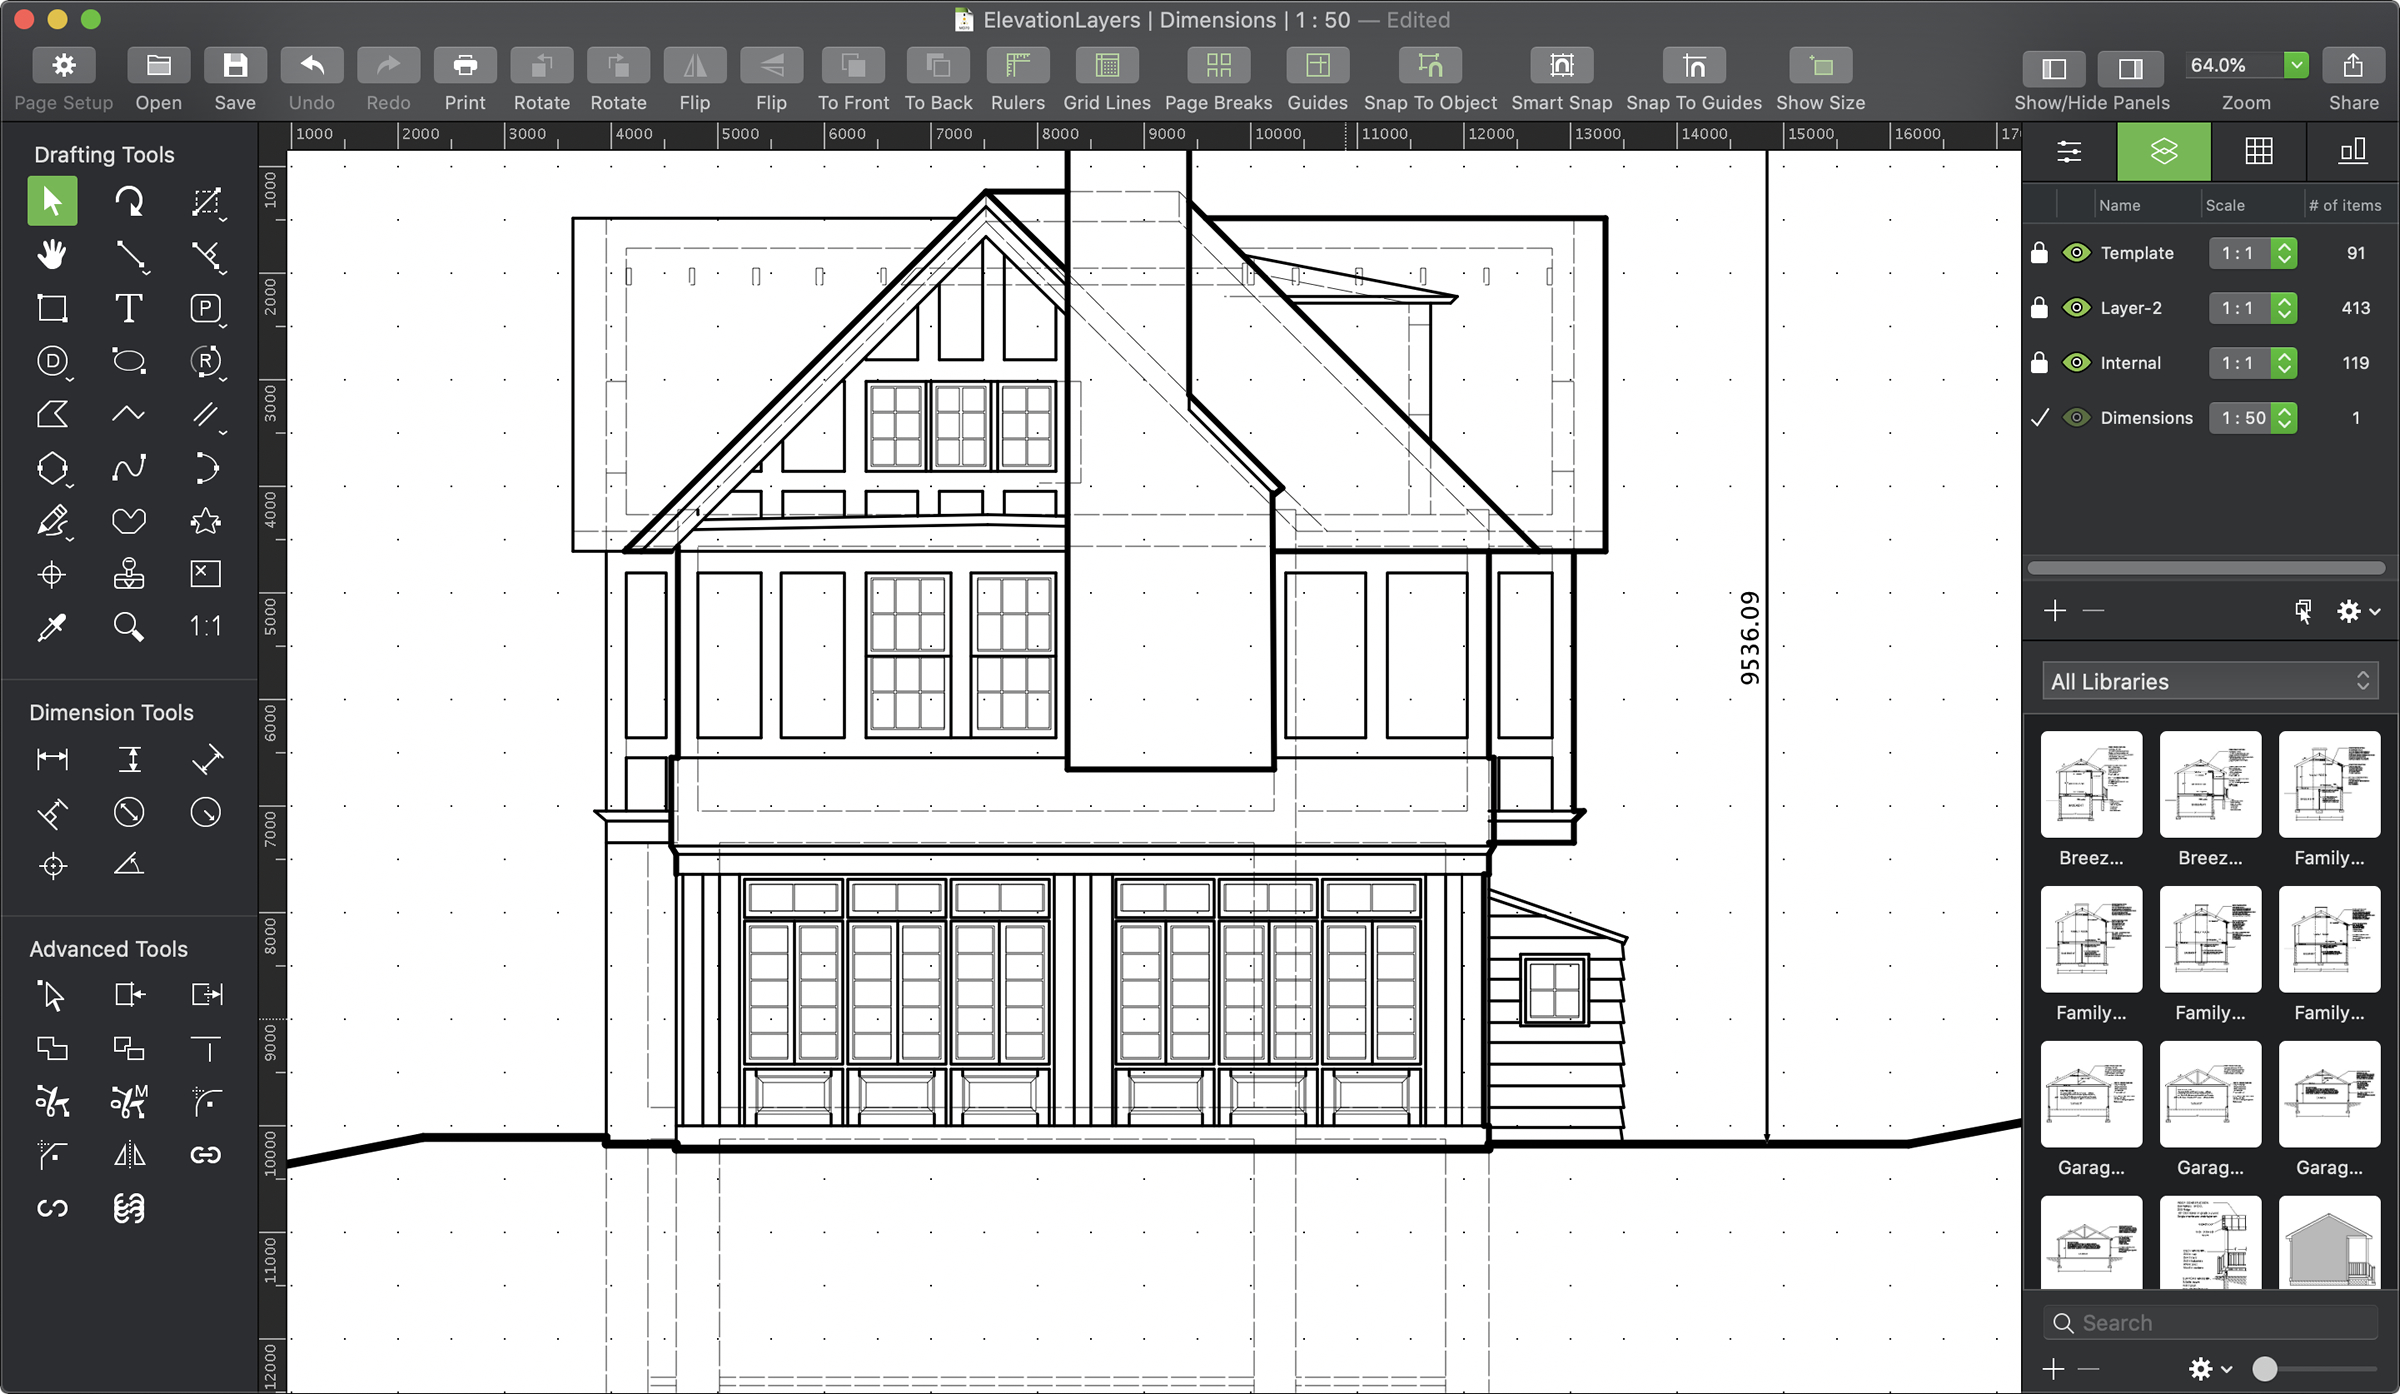
- Choose 1:50, you will notice the rulers change in the document to represent the 1:50 scale we will now be working with.
- Use the Vertical Dimension tool to measure the height of the elevation (See Working with dimensions for more information).
- For reference select Layer-2 to make it the active layer. Add a vertical dimension in the same place. You will notice because the layer scale is 1:1, the size shown will be different! You can delete this dimension as we were only drawing it to show the scale difference.
Step 5 - Layer visibility
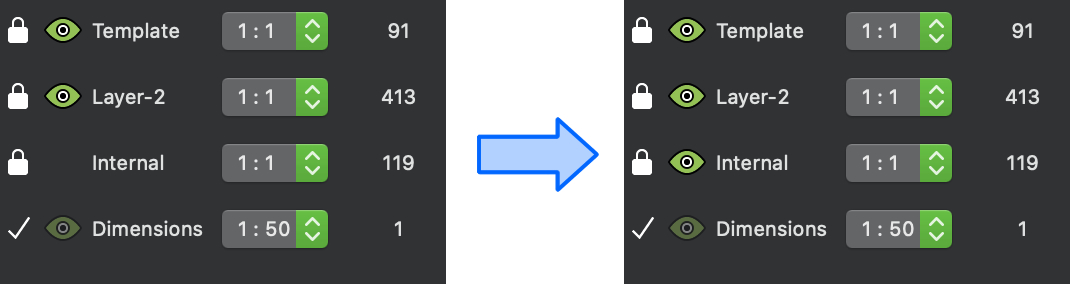
Layers can be visible, hidden or ghosted. This allows you to show or hide particular aspects of the drawing. You may have noticed that the Internal layer is currently hidden. Click on the blank square to the left of the layer name (where the eye icon should be) to make it visible.
This will make the internal layer visible and show dashed lines on the document.
Step 6 - Merge layers
There is also the option to merge layers in MacDraft. It’s a great tool for bringing together multiple layers of data to work on at the same time. This tool can only be used when selecting layers of the same scale.
- Add a new layer using the + (Plus) button
- Hold the Command key down on your keyboard to multi-select layers and select both Dimensions and the new layer.
- Now go down to the Options (Gear) menu in the bottom right of the Layers panel and choose Merge Selection.
- An error message will appear. We didn’t choose two layers of the same scale!
- Using the skills you learnt earlier, change the scale of the new layer to 1:50
- Select the two layers again and Merge Selection from the Options (Gear) menu.
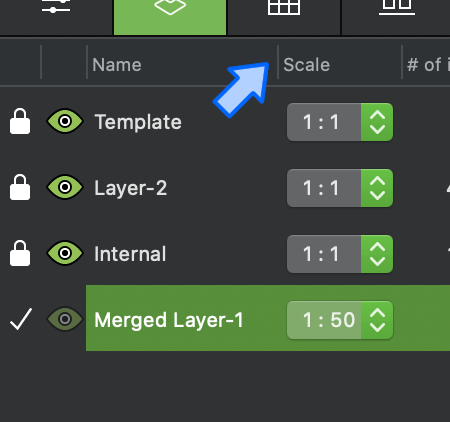
- The layers will now be merged into 1 at the 1:50 scale. You can resize the name field if necessary by clicking and dragging the line between each column title.
Step 7 - Layer Selection tool
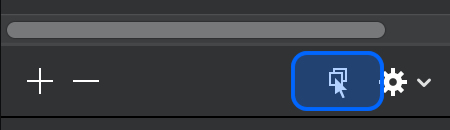
The layer selection tool is found next to the Options (Gear) symbol in the Layers panel. This tool allows you to select any object in the document regardless of if you’re on that layer or not and it will then make the layer it is on active.
- Make the Internal layer the active layer by clicking the Padlock symbol next to its name (remember the active layer has a Tick symbol).
- Select the Layer Selection tool (The cursor will change to n arrow with a question mark).
- Click on the wooden extension on the drawing (shown in image below). Notice the active layer changes to the Template layer.
- If you love a keyboard shortcut like we do, you can also hold the Control and Option(alt) keys down on the keyboard, then select any object in the drawing to change to its layer, without having to select the Layer Selection tool.
Step 8 - Moving/Dragging layers
The position of the layers in the Layers panel is important as it determines which of the objects are positioned above the others. The lower the layer is down the list the higher its content will be in the drawing. You can move the layers position simply by dragging it up and down in the list.
Advanced Step (MacDraft Pro users only) - Moving an object from one layer to another
MacDraft Pro allows you to select an object drawn on one layer and move it to another. In the previous step we realised that the small wooden extension on the drawing was on the template layer, this is of course incorrect. Lets move it to Layer-2 where it belongs with the rest of the drawing.
- Select the small wooden extension in the Template layer
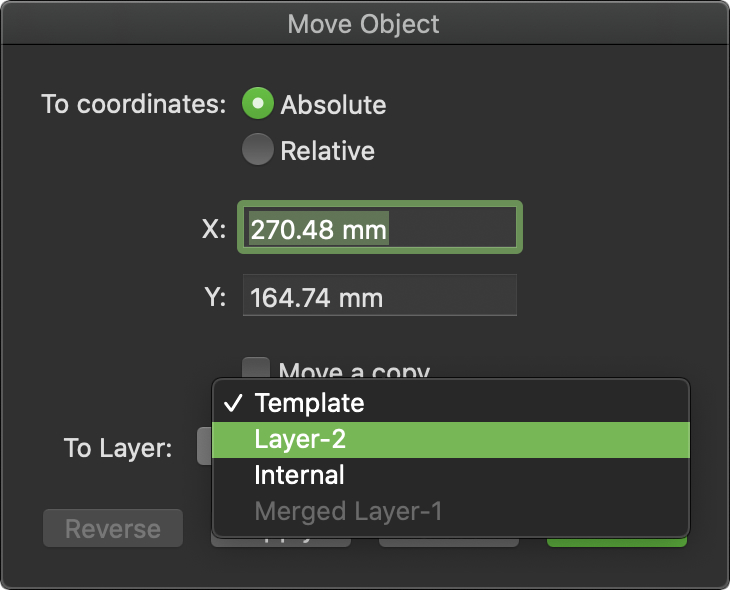
- Go to the Edit Menu and choose Move... and the dialog below will appear
- In this dialog you can move the selected object to a different position on the drawing using coordinates but MacDraft Pro users can also move the object to a different layer. Select Layer-2 from the pop up and then press OK. Note: You may have noticed that ‘Merged Layer-1’ was greyed out in the pop up, this is because it is a different scale, objects can only be moved between layers of the same scale.
- The small wooden extension is now on Layer-2 with the rest of the drawing.
Summary
With this tutorial you should now be familiar with the Layers panel and how to qork with all of the key Layers features and options. Experiment with the skills you have learnt to create more complex drawings and work faster and more efficiently with your documents. Note: The only other difference between MacDraft PE and MacDraft Pro 7 regarding Layers is that you can only have a maximum of 5 layers in MacDraft PE.